
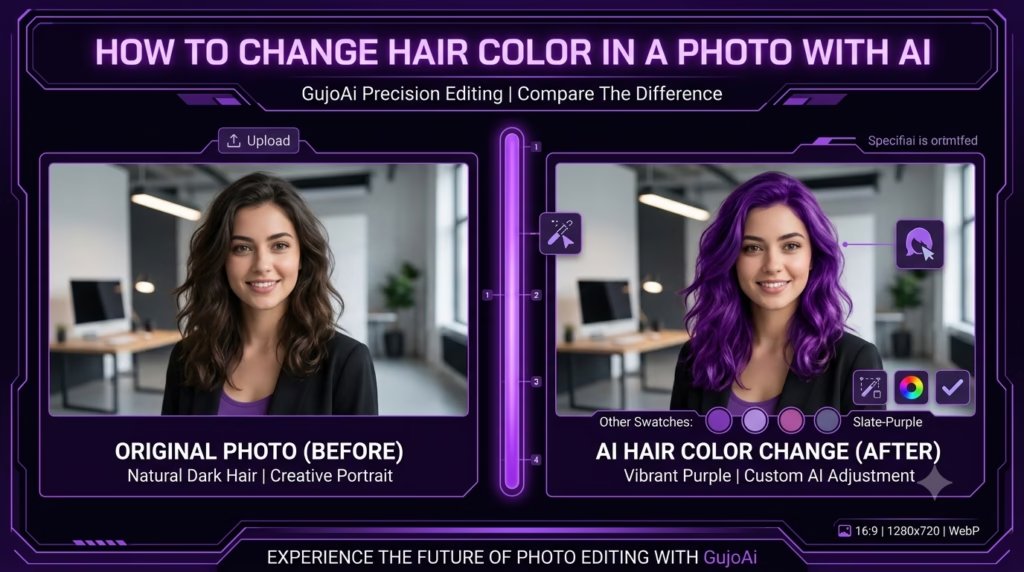
How to Change Hair Color in a Photo With AI
You can change hair color in a photo by uploading a clear portrait to an AI hair color changer, selecting or describing a shade and generating a virtual preview. The best input shows the full hairstyle in neutral light, with no hat, heavy shadow or similar-coloured background hiding the edges.
What Is an AI Hair Color Changer?
A preview helps you compare ideas, but it cannot predict the exact result of real dye on your starting colour, hair condition or previous treatments. GujoAi offers a browser-based Hair Color Changer workspace for natural and creative shade experiments. This guide shows you how to prepare a selfie, choose useful colour descriptions, check realism and compare results responsibly before sharing a new look or speaking with a stylist.
An AI hair color changer is a photo-editing tool that identifies the hair area and creates a preview in a different colour while trying to preserve the face, hairstyle, texture and lighting. It acts like a virtual try-on rather than applying real dye.
Some tools offer preset colours such as black, brown, blonde, red, silver, pink, purple or blue. Others accept text instructions, allowing you to ask for a more specific result such as “cool dark brown,” “copper red,” “ash blonde highlights” or “pastel lavender ends.”
The tool may use segmentation to separate hair from skin, clothing and background. A generative model can then reinterpret colour, highlights and shadows so the edit looks less like a flat painted layer.
People use virtual hair colour previews to:
- Compare natural shades before a salon appointment
- Explore bold colours without a permanent change
- Plan cosplay, creator or character visuals
- Make social posts and profile-picture variations
- Discuss highlights, roots or ombré placement with a stylist
- Visualise a character design or anime portrait
The image is still a simulation. Screen brightness, camera white balance and the AI’s choices can change how the shade appears. Treat it as a conversation aid, not a guaranteed dye result.
How Does Hair Color AI Create a Realistic Preview?
The system first estimates which pixels belong to the hair. It then changes the colour while attempting to keep visible texture, individual strands, shine, shadows and the original shape.
Why does texture matter?
Real hair is not one solid colour. It contains darker roots, lighter highlights, reflected light and overlapping strands. A realistic edit keeps those brightness differences while shifting the hue. If the tool replaces everything with one flat colour, the result looks like a digital helmet.
Why is dark hair harder to lighten virtually?
Very dark hair contains strong shadows and limited visible colour variation in some photos. An AI preview can imagine a light blonde result, but real hair may require bleaching and several processes. The simulation does not measure pigment, strength or chemical history.
Why do hair edges fail?
Loose strands, curls, flyaways and motion blur make the boundary difficult to detect. The tool may colour part of the background or leave the original shade around the hairline. Similar colours—brown hair against a wooden wall, for example—make separation harder.
Can AI keep the face unchanged?
A specialised changer should focus on hair, but generative tools can alter eyebrows, skin tone, face shape, makeup or background. Compare the result with the source and reject versions that change identity. You should be judging the colour, not a rewritten face.
Which Photo Works Best for a Hair Colour Preview?
Use a sharp portrait taken in soft, neutral light. The camera should show the hair’s shape and natural brightness without strong colour filters.
Show the full hairstyle
Wear the hair down or in the style you want to evaluate. A bun, hood, hat or hand covering a large area leaves the AI less information. Include the top, sides and ends in the frame.
Use natural or neutral light
Warm indoor bulbs can make every shade look more orange; blue light can make it look cooler. Soft daylight near a window is a useful starting point. Avoid mixed lighting from a window and a coloured lamp.
Choose a simple background
Use a background that contrasts with the hair. It does not need to be white, but it should not have busy patterns or the same colour. This helps protect flyaways and curls.
Avoid beauty filters
Filters may smooth hair texture, change skin tone and shift colour before the AI edit begins. Use an unfiltered image so the new shade can be compared more honestly.
Keep the camera angle natural
A front-facing or slight three-quarter portrait is easiest for judging how the colour works with the face. Use a second side or back photo if placement at the ends, roots or underneath matters.
Remove personal information from the background and check the tool’s privacy terms before uploading a client or another person’s portrait.
How Do You Change Hair Color in a Photo Step by Step?
Choose two or three realistic comparison shades rather than testing a random list.
- Select a clear portrait. Use an unfiltered image with the full hair visible in even light.
- Save the original. Keep an untouched copy for accurate before-and-after comparison.
- Crop for the purpose. Include the full hairstyle for planning; use a tighter crop only for a profile picture.
- Open a virtual changer. The GujoAi Hair Color Changer is designed for browser-based portrait uploads and colour previews.
- Upload with permission. Do not use another person’s photo without their agreement.
- Choose a colour family. Start with brown, black, blonde, red or a creative family, then narrow the undertone.
- Describe the placement. State whether you want full colour, highlights, roots, tips, split colour or ombré if the tool supports written direction.
- Generate the first preview. Keep face, lighting and background as consistent as possible.
- Inspect the mask. Check hairline, ears, loose strands, eyebrows, clothing and background for accidental colour.
- Compare against the original. Use side-by-side images at the same size and brightness.
- Test one nearby alternative. Compare cool versus warm or one level lighter versus darker rather than changing everything.
- Save a labelled reference. Record the colour description and remember that a stylist or dye brand may use a different naming system.
Current publishing check: Run a real test on the live Hair Color Changer before this article is published. If it remains a frontend preview or does not yet generate and download an edited image, keep this note in the draft and avoid claiming that the live tool completes the change.
How Do You Choose a Realistic Hair Colour?
Start with the goal. A social-media experiment can be playful, while a salon reference should be specific enough to discuss.
Separate depth from undertone
Depth describes how light or dark the colour is. Undertone describes whether it appears warm, cool or neutral. “Medium brown” is broad; “medium cool brown with subtle ash highlights” gives a clearer visual direction.
Warm shades may include gold, copper, caramel or auburn. Cool shades may include ash, smoky, blue-black or icy tones. These labels vary across brands and screens, so use the picture as a visual reference rather than relying on the name alone.
Consider the starting colour
AI can change black hair to pale blonde instantly. Real colour cannot always do that safely in one step. Previous dye, bleach, texture and hair condition affect the process. Ask a qualified stylist about what is practical.
Compare in neutral conditions
View the images on the same device with brightness and colour filters unchanged. Night mode can warm the screen. Compare the new shade with the face, eyebrows and clothing, but remember that the AI may also have adjusted those areas.
Test natural and creative versions differently
For a natural result, look for preserved roots, varied highlights and believable shine. For blue, pink or purple, check whether the colour still follows curls and shadows. Bright does not have to mean flat.
Use a small comparison grid
Place the original beside three options using the same crop. Too many choices make small differences hard to judge. Label each image with a simple description, not a product promise.
Virtual Hair Color vs Real Hair Dye
| Factor | AI hair colour preview | Real hair dye result |
|---|---|---|
| Speed | Appears in seconds after generation | Application and processing take time |
| Commitment | Photo only | Temporary, semi-permanent or permanent change |
| Starting colour | Can simulate a large change instantly | Strongly affects the achievable result |
| Hair condition | Not measured | Influences safety, colour and texture |
| Accuracy | Useful visual approximation | Depends on product, process and hair history |
| Best use | Exploring and discussing ideas | Creating the actual physical change |
A virtual try-on helps answer, “Do I like this general direction?” It cannot answer, “Which exact formula will produce this result safely?”
If you plan to dye your hair, follow the product instructions and professional guidance. The FDA hair-dye safety guidance advises doing a skin patch test every time before dyeing, keeping dye away from the eyes, wearing gloves and not leaving it on longer than directed. Do not use an AI preview as safety advice.
If you have had a reaction, have a damaged or irritated scalp or plan a major lightening process, speak with an appropriate professional. Stop and seek urgent medical help for signs of a serious allergic reaction.
What Mistakes Should You Avoid?
Do not choose a real dye only because one generated portrait looks flattering. The image may change lighting, makeup, skin tone or even the face.
Avoid these mistakes:
- Uploading a dark, filtered or blurry selfie
- Hiding most of the hair under a hat or tied style
- Using a background that merges with the hair
- Asking for “blonde” without specifying lightness or undertone
- Comparing images made with different lighting and crops
- Ignoring colour bleeding onto skin, clothes or background
- Believing a preview predicts bleaching or chemical results
- Applying dye without following the current product instructions
- Skipping the manufacturer’s allergy test requirements
- Using another person’s portrait without permission
- Promising a client or salon that AI output is colour-accurate
For creator content, disclose heavy edits when the image could mislead an audience about a real transformation or product result. Do not use a virtual preview as fake before-and-after evidence.
If you only need an anime avatar, you can change the portrait first and then use a photo-to-anime tool, or reverse the order and edit the illustrated hair. Test both because generative conversion may reinterpret the chosen colour.
Frequently Asked Questions
How can I change my hair color in a photo?
Upload a clear, unfiltered portrait to an AI hair color changer, choose or describe a shade and generate a preview. Check the hairline, loose strands, face and background before saving or comparing the result.
Is there a free AI hair color changer?
Some tools offer free previews, limited generations or welcome credits rather than unlimited use. Check output resolution, watermark, privacy and download rules before uploading an important portrait.
Can AI show which hair color suits me?
AI can create useful visual comparisons, but “suits” is personal and the tool may change lighting or skin tone. Compare a few consistent previews and use them as inspiration rather than an objective decision.
Can a virtual hair color preview predict real dye results?
No. Real results depend on starting colour, previous treatments, hair condition, product and application. A preview can support a conversation with a stylist but cannot supply a guaranteed formula or safety assessment.
What photo is best for changing hair color with AI?
Use a sharp front or three-quarter portrait in neutral light, with the full hairstyle visible against a contrasting background. Avoid filters, hats, heavy shadows and motion blur.
Ready to create something remarkable?
To change hair color in a photo, use a clean portrait, describe the shade clearly and judge the edit for preserved texture and identity. Treat the result as a creative preview, not a promise of how real dye will behave. Create a free GujoAi account for 10 welcome credits and test the Hair Color Changer after real generation has been enabled and verified.