
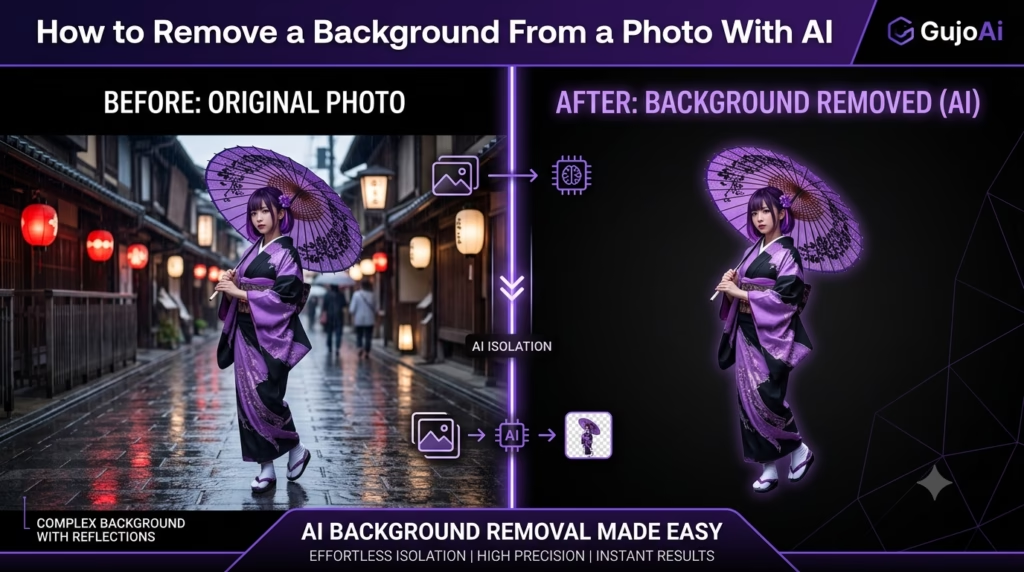
How to Remove a Background From a Photo With AI
You can remove a background from a photo with AI by uploading a clear image, allowing the tool to identify the main subject and exporting the cutout as a transparent PNG or placing it on a new background. The cleanest results come from sharp photos where the subject is visually distinct from the surroundings.
What Is an AI Background Remover?
Hair, fur, glass, shadows and similar foreground and background colours need extra review because automatic selection can miss fine edges. GujoAi provides a browser-based Background Remover workspace for profile pictures, product visuals, thumbnails and creative edits. This guide shows you how to prepare the image, remove the background, inspect difficult areas and choose the right output so the final cutout does not look like a rough sticker.
An AI background remover is an image-editing tool that separates the main subject from its surroundings automatically. It predicts which pixels belong to the foreground and which belong to the background, then creates a mask around the subject.
A mask is like a digital stencil. Visible areas stay in the image; hidden areas become transparent or are replaced with a selected colour. The original subject is not necessarily redrawn. In a basic removal workflow, the tool mainly decides what to keep and what to delete.
This is different from cropping. Cropping changes the rectangular frame and may remove space around a person, but it cannot follow the outline of hair, clothing or a product. A background remover creates a cutout that follows those edges.
Common uses include:
- Transparent product photos for shop listings
- Profile pictures with a clean or branded background
- YouTube and social-media thumbnails
- Presentation graphics and simple composites
- Stickers, posters and creator merchandise
- Anime characters placed into a new scene
- Passport-style layouts when official rules permit digital preparation
AI makes the first selection faster, but a creator must still check the result. A missing earring, clipped strand of hair or leftover patch between an arm and the body can make an otherwise good edit look careless.
How Does AI Remove an Image Background?
The system analyses the image and estimates the boundary between foreground and background. It may use object recognition, semantic segmentation and edge refinement to understand shapes such as people, animals, products and vehicles.
What makes a subject easy to detect?
A well-lit person against a plain wall gives the model a clear visual difference. A dark product on a dark table is harder because colours and edges overlap. Sharp focus also matters: a blurry boundary does not tell the system exactly where the subject ends.
Why are hair, fur and glass difficult?
Hair and fur contain many thin strands with spaces between them. Glass and translucent fabric allow some background colour to show through. A simple hard mask may remove too much or retain a visible halo.
Good tools soften or partially preserve edge pixels rather than treating every pixel as fully visible or fully transparent. This is sometimes called alpha transparency. It helps a cutout blend into a different background without a jagged outline.
Does the AI change the original image?
The subject should remain visually similar, but automatic cleanup can remove soft shadows, thin accessories or semitransparent areas. Always keep the original. Export the cutout as a new file so you can compare it and redo the process when necessary.
For readers interested in how transparency is stored, the W3C PNG specification explains the Portable Network Graphics format and alpha information used for transparent images.
Which Photo Gives the Cleanest Cutout?
Start with the highest-resolution original available. A clean source helps the model find the boundary and gives you more room for later resizing.
Create separation between subject and background
When taking a new photo, avoid placing black hair against a black curtain or a white product against a bright white surface. You do not need a green screen; visible contrast is usually enough.
Use even light
Harsh backlight can create bright fringes around hair. Deep shadows can merge clothing into the background. Soft front or side light makes the true outline easier to detect.
Keep the subject sharp
Motion blur and portrait-mode blur can erase edges before the remover sees them. Focus on the eyes for a person and the main front surface for a product. Leave a little space around the subject instead of cutting off hair, elbows or packaging in the camera.
Reduce visual overlap
An arm pressed against the body, hair crossing a patterned jacket or a product surrounded by similar objects creates ambiguous boundaries. If you control the photo, simplify the scene first.
Use a clean file
Avoid screenshots and repeatedly compressed social-media downloads. JPEG blocks around an edge can become part of the mask. Use the camera original or a high-quality PNG, JPEG or WebP file.
If the source is small but otherwise correct, choose the cutout first and use an image upscaler later. Upscaling before removal may invent texture around the boundary and make the mask harder to judge.
How Do You Remove a Background Step by Step?
Decide first whether you need transparency, a white product background or a coloured creative background.
- Choose the best source. Use a sharp, high-resolution image with the full subject visible.
- Copy the original. Work on a duplicate so the untouched file stays safe.
- Crop obvious empty space. Keep a comfortable margin around hair, clothing or product edges.
- Open a removal tool. The GujoAi Background Remover is designed around a browser upload and output-selection workflow.
- Upload the image. Check that you have permission to edit and use it, especially for another person or a client.
- Choose the output type. Select transparent PNG for flexible reuse, white for many product layouts or a colour that matches the final design.
- Run the automatic removal. Let the tool create the first mask.
- Zoom into the edge. Inspect hair, ears, fingers, loose clothing, fur, handles and gaps between objects.
- Check it on two backgrounds. A white halo is easy to miss on white. Preview the cutout on both a light and dark colour.
- Refine if controls are available. Restore removed details, erase leftover background and soften unnatural hard edges.
- Export the correct file. Download PNG when transparency must remain. Use JPEG only after placing the subject on a solid background.
- Resize for the destination. Keep a full-resolution master and create smaller web copies separately.
How Can You Fix Hair, Halos and Rough Edges?
Automatic removal is the first pass. Edge review is what makes the result usable.
Preview on a contrasting colour
Place a light-haired subject on dark grey, then on white. This exposes background fragments and missing soft strands. A transparent checkerboard alone is not always enough.
Remove colour spill
Light reflected from the old background can tint the subject’s edge. Green-screen photos may have a green fringe; a bright wall can create a pale halo. Some tools offer decontamination or edge-colour controls. Otherwise, use a small manual brush or slightly contract the mask.
Preserve natural softness
Hair should not look cut from cardboard. Avoid over-erasing every soft pixel. A subtle feather can help, but too much creates a foggy outline. Check at final size because a minor rough edge at 400% zoom may disappear in a small profile image.
Restore holes and internal spaces
Look between fingers, inside handles, under arms and through loose curls. The model may keep background islands or remove genuine gaps. Correcting these spaces often has more visual impact than chasing individual hairs.
Keep realistic contact shadows
A product placed on a new surface can appear to float if all shadow is removed. Preserve a clean natural shadow or create a new one that matches the background light direction. Do not keep a shadow from the old scene if it conflicts with the replacement.
Regenerate instead of over-editing
If the subject and background share the same colour across a large area, a new photo may be faster and more accurate than detailed mask repair. Good creators know when the source—not the tool—is the main problem.
Transparent PNG vs White or New Background
| Output | Best for | Main advantage | Watch out for |
|---|---|---|---|
| Transparent PNG | Reusable cutouts, design layouts and overlays | Can be placed on many backgrounds | Larger file size and edge halos |
| White background | Product listings, documents and clean profiles | Simple and widely compatible | White products may lose definition |
| Brand colour | Social posts and campaign graphics | Creates a consistent visual system | Colour spill and low contrast |
| New scene | Thumbnails, stories and composites | Adds context and mood | Light, perspective and shadows must match |
PNG supports transparency; JPEG does not. If you export a transparent cutout as JPEG, the empty area will normally become a solid colour.
For ecommerce, check the marketplace’s current image rules before replacing the background. Some categories require pure white, while lifestyle images may allow a scene. Keep the product’s colour and shape accurate.
For profile images, test the final crop at a small size and inside a circle. Fine hair detail matters less than a clear face and strong separation. For thumbnails, leave intentional space for real text rather than asking an image generator to render a critical headline.
What Mistakes Should You Avoid?
The most common mistake is trusting the one-click preview without zooming in. A cutout can look fine from a distance while losing a finger or retaining parts of the old wall.
Avoid these issues:
- Using a blurry or tiny screenshot as the source
- Cropping through hair, clothing or product edges before removal
- Exporting JPEG when transparency is required
- Checking the cutout on only one background colour
- Removing every natural shadow and making the subject float
- Leaving a bright fringe from the old background
- Placing the cutout in a scene with conflicting perspective or light
- Uploading private, confidential or client images without approval
- Assuming background removal changes ownership of the source photo
- Using an official-document image without checking submission rules
When you add a replacement background, compare light direction, colour temperature, horizon and camera angle. A studio-lit person can look unnatural inside a dark sunset scene unless the foreground is adjusted.
For websites, compress the final image, specify its displayed dimensions and use helpful alt text. A transparent 4,000-pixel PNG can be unnecessarily heavy for a 300-pixel product card. Keep the master, but serve an appropriately sized web version.
Frequently Asked Questions
How do I remove the background from a photo?
Upload a sharp photo to an AI background remover, let it isolate the main subject and review the cutout at high zoom. Export a transparent PNG when you want to reuse the subject on different backgrounds.
Can I remove an image background for free?
Some services offer limited free removals, previews or welcome credits. Check whether full-resolution downloading, transparency and commercial use are included before relying on a free background remover.
Why does my cutout have a white outline?
The original background colour may remain in soft edge pixels, especially around hair or blur. Preview the cutout on a dark colour and refine, contract or decontaminate the edge without making it unnaturally hard.
Is PNG or JPEG better after background removal?
Use PNG when the empty area must remain transparent. Use JPEG only after adding a solid or photographic replacement background because JPEG does not preserve normal alpha transparency.
Can AI remove a background around hair?
AI can handle clear hair edges, but fine strands, motion blur and similar background colours can cause mistakes. Use a high-resolution photo, check both light and dark previews and refine the mask when needed.
Ready to create something remarkable?
To remove a background from a photo cleanly, use a sharp source, inspect the automatic mask and choose an output that matches the final design. Edge quality, realistic shadows and correct export format matter more than a fast one-click preview. Create a free GujoAi account for 10 welcome credits and use the Background Remover after real API output and downloading have been enabled and verified.